Okay Google, fetch a pizza - Google Home Action with NightwatchJS and AWS Lambda
Chicago is most famous for it's deep dish pizza but statistically speaking it prefers 'tavern style' thin crust according to Wikipedia. During the pandemic I've been migrating my older "button press" home automation scripts to Google Home Actions' voice commands and have finally got around to redoing the pizza ordering script. This post goes over how to automate a delivery order with Node and attach it to a Google Home Action.
Order Automation with Nightwatch
My original pizza script needed a rewrite since the restaurant revamped their website and started using an new interface for their ordering. Browser drivers have been around for a long time, they're essentially programs that control a websession by opening a browser and triggering preprogrammed actions. Officially, this is meant for testing front-end code and various functionality but it can be repurposed for my pizza ordering side project.
Installation and configuration.
There are a ton of good browser 'drivers' that automate web sessions. Selenium is currently still the most popular and many libraries still use it. NightwatchJS built on top of Selenium and other WebDriver services like ChromeDriver and GeckoDriver. I'm using Nightwatch because I've been using it for testing at work and have written scripts with it recently.
npm i nightwatch
Nightwatch automation requires two pieces; a configuration file, and a script.
I'm leaving room for more restaurants so I want to leave out the
src_folders and the launch_url from the
configuration file.
module.exports = {
    webdriver: {
        start_process: true,
        port: 4444,
        server_path: require('chromedriver').path,
        cli_args: [],
    },

    test_settings: {
        default: {
            desiredCapabilities: {
                browserName: 'chrome',
            }
        }
    }
}
Nightwatch supports multiple WebDrivers, and they need to be installed separately. In the example above chromedriver automates a Chrome session. The geckodriver is for Firefox. Microsoft Edge requires a few more steps to install whereas Safari just requires that it be installed, the driver is included by default (v10+).
npm i chromedriver geckodriver
Automating an order.
We have a few go-to pizza restuarants but they're not all suited for automating. For one thing, if you're using WebDrivers to crawl a site it is painfully obvious. So if a company is taking even rudamentary steps to prevent crawling/automation then I move on since I don't want to invest the time to get around those mitigations. Also a website that is actively discouraging crawling/automation is not a good candidate since they're far more likely to introduce some update to break the script. The main drawback for these scripts is that they are fragile. The automation requires hooking onto DOM elements, classes, tag attributes, and ID's that can all change whenever the target site's developers make an update to the UI. That's why I pick restaurants that have older looking UIs and that I've noticed don't update as often, the script will work longer. The last pizza script worked for about ~3 years.
module.exports = {
    'Order a Pizza': function(browser) {
        browser
            .url('https://pizzarestaurant.com')
            .waitForElementVisible('#root', 5000)
            // trigger actions, click stuff, fill out forms, submit ...
            .end();
    }
}
This is the app stubbed out. All the automation steps can be chained together. The NightwatchJS API has some thorough documentation for all their function calls but there's only a few really necessary to handle placing an order. Most of the commands need to know what DOM element to click/interact with. Nightwatch uses CSS/XPath to identify elements. It defaults to CSS selectors, these should be enough for almost any task.
waitForElementVisible(selector, timeout)
The waitForElementVisible function does exactly that, it waits for an element to be visible before moving on. This function takes a timeout and fails if the element is not found in time. Use this on the initial page load and after expected page changes to allow for variable page loading times.
setValue(selector, value)
The setValue function lets you input data into form fields. Again, just use the default css selector to uniquely identify the field to update.
browser
    .setValue('input#uniqueId', 'field value')
pause(time_ms)
The pause pauses the app for a specified amount, this is handy for making sure the page loads or updates after completing an action.
browser
    .pause(2000)
frame(frameIndex)
browser
    .frame(0)
The frame function is the most important for the checkout automation. Most of the restuarant checkouts iframe in the payment processing. The frame function is required to be called before any actions within an iframe such as adding a credit card number to a field in a framed checkout form.
Lambda Setup and Configuration
Lambda's serverless (misnomer) functions are very cheap and very basic. Spinning up Selenium and ChromeDriver requires a bit more setup than just installing a library. The most efficient way to include them is to use Lambda layers. Layers preconfigure and setup requirements for a function so that they're avaiable at runtime. Lambda allows for a max of 5 layers, this projects utilizes two, one layer for Selenium, and one for ChromeDriver.
Adding a Selenium layer.
Adding a ChromeDriver layer.
This project is using chromedriver, replace this with whichever driver needed.
Creating a Google Home Action
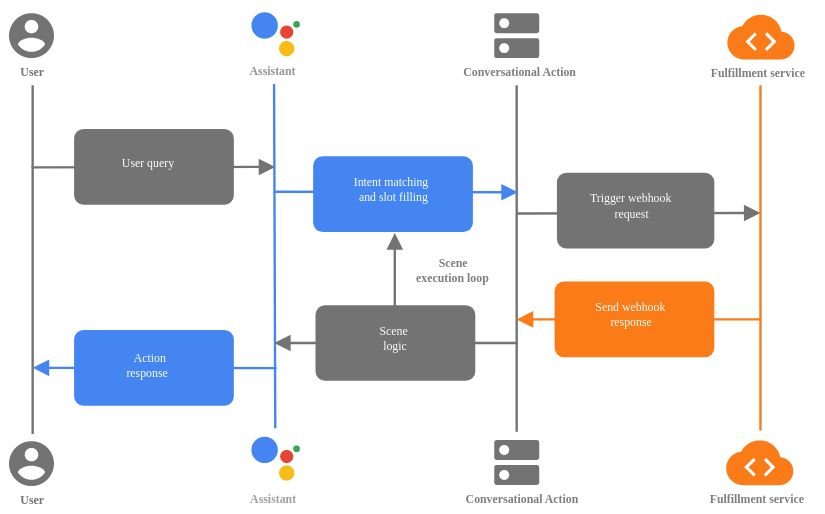
A Google Home Action handles a conversation with the speaker and triggers a fullfillment service (processing endpoint). A fullfillment service is just an HTTPS webhook endpoint that takes the request data in, processes, and responds. This simple flow (below) can create some incredibly complex applications. Lucky, this use case is as basic as it gets; the fullfillment service accepts the request, triggers the pizza order and sends a success response.

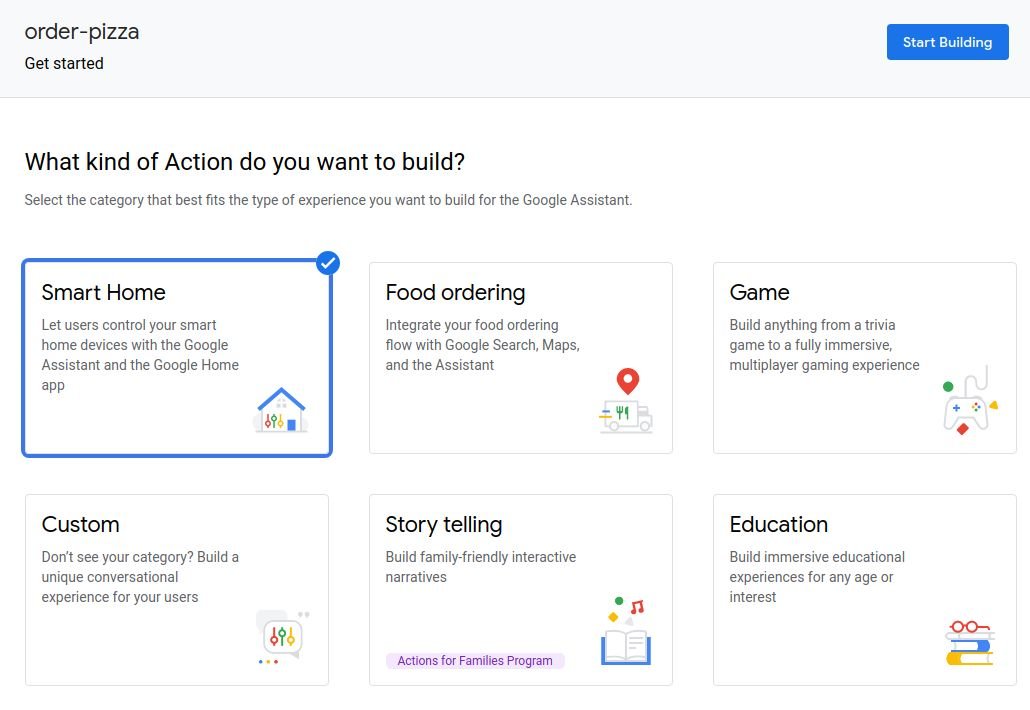
Login to the Google Actions panel in Google Console. From the panel create a new Action and select Smart Home. There is an option for "Food ordering" but this is for another use case, this setup only requires Google to ping a webhook and reply with a success or failure confirmation.

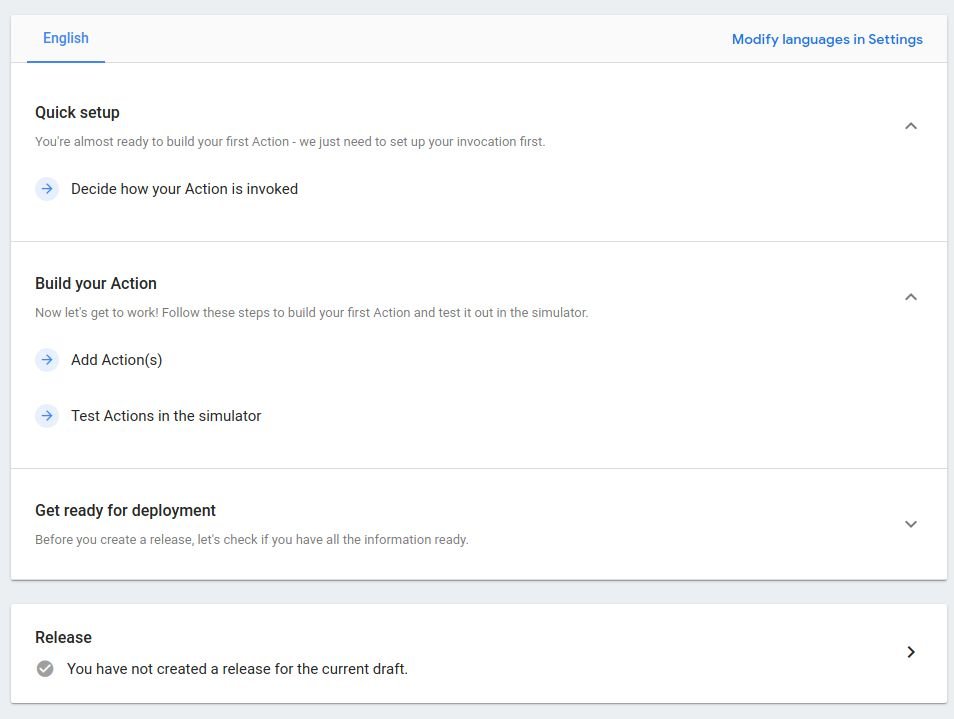
To get started on setting up the conversation in Dialogflow click "Add Action(s)".

Google has created a development suite for programmed conversations called Dialogflow for scripting natural language conversations. Dialogflow is a big subject on its own but for the purposes here this is where the voice commands and responses are crafted. Before diving into the next part breeze over the basics to pickup some of the terminology and concepts.

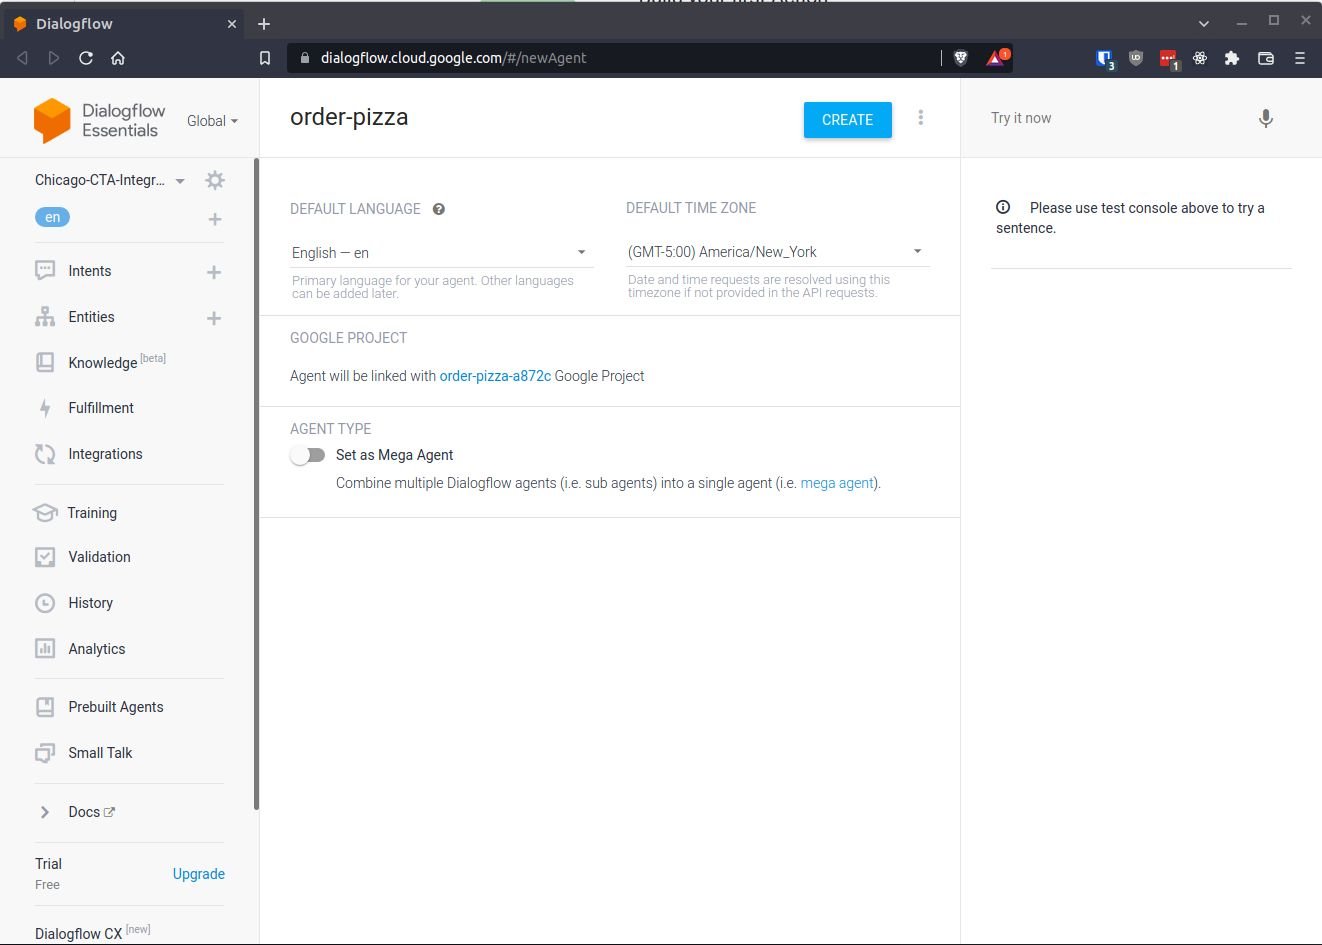
The core of the app requires creating an Agent and scripting the Intent. Create a new Agent in the upper left of the Dialogflow console. I'm planning to have multiple pizza restaurants hooked up in the future so I'm naming the Agent for the restaurant. Once the Agent is named create an intent.
Currently, an Intent has four fundamental aspects:
Training Phrases | The statement from the user that triggers the conversation. This script uses training phrases but Dialogflow can also trigger an intent with non-verbal queues using |
Action | The action is the label for the intent or handler name, it gets sent over to the webhook. If there were multiple intents this would differentiate them to the endpoint. |
Parameters | Google's machine learning alogrithms pull out or calculate the expected parameters from the conversation, it sends these over to the webhook. |
Responses | This is the response crafted from the data passed over. For this app it's going to be a simple success or failure message. |